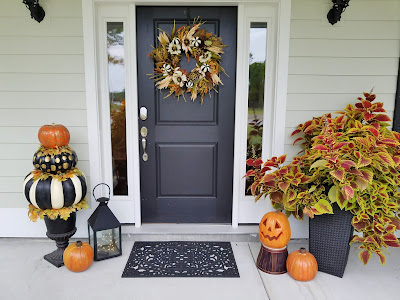
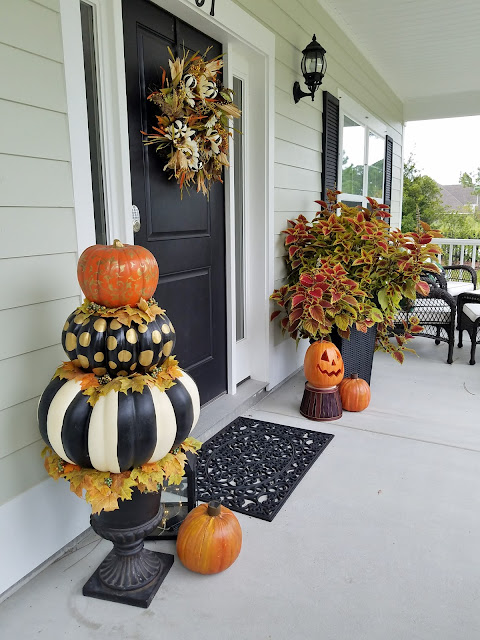
My latest Fall creation, a large pumpkin topiary using artificial pumpkins.
I didn't take "during" photos but it's a simple process and this is what I
started with. The huge white pumpkin I used for the base was purchased at Michael's.
This size can be pricey but it happened to be on sale the day I bought it.
The medium sized black pumpkin was found at Target last year and the small
pumpkin is one I already had that I had painted with dots and stripes years ago.
I also purchased a few fall leaf garlands at Michaels.
I love that you can reinvent and reuse these artificial pumpkins!
Here they are before assembly when I was still painting them.
For the large bottom pumpkin, I spray painted it off white. I was already a
cream color but I wanted a crisper background. After it was dry, I
painted thick, black stripes using regular acrylic craft paint.
The middle pumpkin was already glossy black so I only
painted gold metallic dots. I used several layers of
DecoArt Dazzling Metallics in Glorious Gold to get the opaque look
I was going for. I love this particular gold, it is my go-to gold color.
The top pumpkin had to be primed with spray primer to cover the previous orange
stripes and dots and then sprayed with orange spray paint. If you already
have an orange pumpkin, you are good to go.
To create the top pumpkin design, I grabbed a small swirly stencil
I had and just held it in different areas over the pumpkin while I sponged on top of
the stencil with dark metallic gold to get the scrolled pattern. It doesn't have to
be perfect. You could also free hand gold swirls, or paint whatever
design you like!
I added a few highlights by loosely painting over the stenciled area with a lighter gold.
After dry, I brushed the whole piece with watered
down brown paint and quickly and gently wiped away the excess to give it a little
depth. I painted the stem gold and sealed the whole thing with spray satin sealer.
All the pumpkins and the leaves are glued in place with hot glue.
I already had the black pedestal planter on hand and the topiary actually just sits on top of the urn with a few spots of glue to hold it in place so I can remove it later.
The whole pumpkin stack is surprisingly light.
I love the look of it on our front porch along with our solar pumpkins.
You can spin the pumpkins with the cut outs facing to the back for just a regular pumpkin look.
I originally created this post in 2015. It is Fall 2019 and here it is today. This
year I set it on top of a wooden basket for the base.
I added a wreath that I found at a local store but plumped it up with
more fall foliage sprays and small foam pumpkins that I painted with
black and cream stripes.
See my other Halloween and Fall decorating ideas
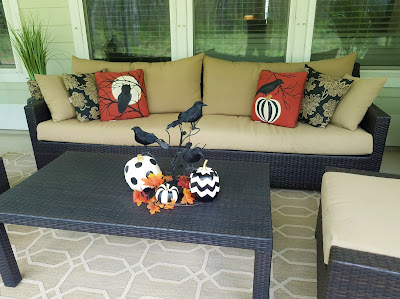
Dollar store studded pumpkins and Halloween painted pillows...shown below
They turned out great and add a little Halloween flair to the back porch.
Fall 2019, I moved the painted pillows to the front porch.
Thanks for checking out my pumpkin topiary.
Happy Fall, Happy Halloween, and all that good stuff!
Visit my new online store for coastal and nature themed mosaic art, and
coastal ornaments.
Cheers!
~Lucy


Fabulous!!
ReplyDeleteJenna
Lobe these ideas! Do you remember what sizes of pumpkins you used?
ReplyDeleteThank you Mandy! I don't remember exactly, was just trying to get one large enough for the bottom to fit the planter I already had.
Deletewhere did you purchase the vase?
ReplyDeleteThe urn was one I had on hand, I believe I purchased from Target years ago
Delete