Showing posts with label Gel Stain. Show all posts

June 16, 2011

How to Use Gel Stain DIY Gel Stained Master Bath Cabinet Makeover

Welcome to my bathroom cabinet makeover

I'm thrilled with how they turned out!
Here's how I did it....

Removed doors, hinges and drawers...
That's Ace supervising

I labeled the doors...just because... probably not necessary with only four doors

Taped off the wall and counter top...
Then lightly sanded everything with a sanding block.  
I also wiped everything down using a sponge and a little soapy 
water with Dawn dishwashing soap to remove any remaining 
grease or residue.  Wiped clean and dried.

Then we get to the fun part...gel stain!
You brush it on with a foam brush, a roller or even a cloth.
And yay me, I remembered to wear gloves this time.

Read about how I used gel stain over white furniture.
I'm actually using the rest of the quart I bought for that previous project.
The product goes far, you don't need much.

I used General Finishes brand and the color I used is "Java".
On their website you can click the "colors" tab to show all
available colors and they also have a "find a retail store" link to see
where it is available in your area. I ended up ordering mine online
since it wasn't available locally.

After you apply it with a brush or roller, you immediately wipe off with a soft cloth.
I don't have a picture of the wiping part because I was, um, wiping.

I wipe once then leave it, you can always touch up later. 
 If you mess up, you can quickly go back over with more gel stain, then RE-wipe.

The thing to remember when using gel stain like this is that you aren't really "staining".
This is more of a topcoat application where you are basically using it to change the color.

You control how dark you want the finish by how much you wipe off since again,
it's not like the traditional way you think of staining.

Other reasons I'm loving gel stain is ...
#1...it's really easy to work with since it's so thick, like the consistency of pudding.
#2...You can still see the grain of the wood.  
You can lose that sometimes when you use paint.

I left them to dry in my air conditioned garage and they were dry to the touch after about 6 hours.

I ended up leaving them overnight since it was late and applied 2 coats of  
Minwax Satin Polycrylic with a foam brush the next morning.

After drying, I reassembled everything and put on my new knobs
I found at Hobby Lobby.

They are some kind of bone, or maybe resin, but I love 'em.

So yeah... Did I mention I'm loving my cabinets?


That's it until next time...thanks for being here!

Join me on FacebookPinterest
or visit my Etsy store to check out the new items.

May 20, 2011

Gel Stain over White Furniture


The After...

This king bed and two nightstands started out white and I was hired to 
repaint them for a young families second home here at the beach.

They were going to be out of town for a bit so it was the perfect time
to complete the project.

The owners want the bed and nightstands to have the same 
wood tone as this little desk that is also in the room....cute huh?


I started by sanding and base coating with a warm, nutmeg brown color 
and let dry overnight.

I used the colors in the desk undertones as my guideline to choose this warm, 
honey brown color from the paint swatches at Home Depot.
I chose paint that has primer built in and had Home Depot mix up a quart
of interior satin for this base coat.

The next day I rolled on General Finishes brand gel stain in Java. 
This is fun stuff, it's thick like pudding and super easy to use.


You can go to the General Finishes Where to Buy page to see if it is available in your area.
I had to order mine online.


After rolling on you immediately wipe off.
I used soft cotton t-shirt material.

Oh, and I forgot to bring gloves with me and the location was
about 30 minutes from my home or a store that would have
gloves so... I guess I'll have stained fingernails for a few days.

Wear gloves!

I worked in sections on the bed and nightstands...

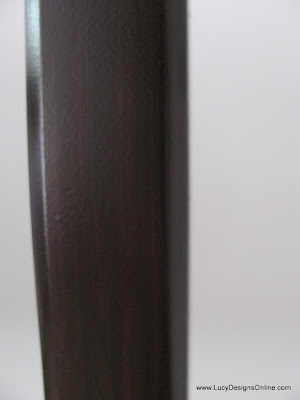
I ended up with this wood grain-ish looking finish...love it!

The gel stain application is really simple and it went quickly. 

I will let dry 24 hours then seal with Minwax Polycrylic in satin finish.

I came back the next day and it wasn't completely dry so I decided to 
give it another day. This was a little odd for it to take so long to dry,
but I knew it would dry eventually and I had plenty of time
before the owners returned.

It's looks really good though!

I went back the next day after giving it more time and it was dry enough to 
apply the polycrylic coat using a foam brush.
General Finishes does offer a wipe on topcoat 
but I have not used it so I can't offer any advice on how it would work.

I have used Minwax Polycrylic for years as a topcoat on all kinds of 
finishes. I'm comfortable with using it so that's what I went with.

My only caution when using this, or any topcoat, especially if it if over
a dark finish like this color of stain, is to be careful of letting it puddle
or apply to thickly because it can leave a milky look, even when dry.

You also have to be a little careful of leaving 
"bubbles" when brushing on with foam brush. If you see bubbles, just quickly
brush over again with the foam brush to remove them and take your time.

I let the first coat of poly dry and applied a second coat and
it dried beautifully and smooth as silk.

I let the polycrylic dry overnight and went back to reassemble everything
 and put the room back together and it looked fantastic.

Join me on Facebook, Instagram and Pinterest 
or visit my Etsy Store

Thank you so much for stopping by!

Total Pageviews

01 09 10 11 12
Blogging tips